Showing posts with label Halloween. Show all posts

Friday, January 1, 2021

Halloween sign

I found this awesome svg from Craft with Sarah on IG.  (I recently discovered IG and its as bad as Pinterest addiction!). Sarah is in the UK and does an amazing job including a video to assemble.  There is a ton of dimension and uses loads of foam tape so be sure to get the big rolls on Amazon!  Thanks for looking! 
April


Monday, October 22, 2018

Fall Pumpkin


This is a medium pumpkin I got at Michaels and added vinyl.  The images were free and found on Pinterest.  On one side, I did a Halloween theme, the other side is Thanksgiving themed.  The vinyl isn't happy about sticking to the pumpkin as it is a bit slick but with some patience and time, it stays.  I love that I will have this for several coming years and it can weather indoor or outdoor.  Thanks for looking!  April

Sunday, October 29, 2017

Mickey Pumpkin

So we totally got screwed out of going to Disney thanks to Hurricane Irma.  I wanted something to perk up the mood because hubs and I were really bummed.  I had a fake pumpkin stashed in the Halloween box and have been wanting to try carving the foam and see if it is easier than a real pumpkin.  What to put on it?  Mickey, of course! 
I found these small "ears" at Walmart for under $1 each and I had the pattern in one of the old kids books.  I realize I should have blown it up a bit more, but it worked okay.  I used a push pin to mark the pattern then an craft knife to cut.  I finished up by using some small craft files.  The foam was really messy and stuck to everything but it was easier, and less gooey, than the real deal.  The ears are attached with wood skewers.  I also cut a hole in the bottom, just big enough for a battery operated tea-light to fit.  Too cute to spook! 
Thanks for looking!  April

Sunday, September 10, 2017

Pixar Up mailbox tote


My hubby and I are going to Mickey's Not So Scary Halloween Party at Walt Disney World.  We are dressing as grown up Carl and Ellie from Pixar's Up.  I wanted to have a cute tote and found this little chipboard mailbox at Hobby Lobby.  My talented teen painted the mailbox by hand.  I punched holes in the top and added a braided cord handle.  There are also hand-made Ellie Badges, tucked inside, to hand out during the party.  Thanks for looking!  April

Wednesday, October 16, 2013

Thanks Jack

This is a quick card I put together with some of my new toys I got from a rubber rummage sale and a RAK from my soul sister.  The base is Very Vanilla with layers of Early Espresso corestock and Pumpkin Pie.  The border punch is Martha Stewart fence.  The embossed layers are the new honeycomb emboss folder from SU.  I used a bit of sandpaper on the embossed image to bring out the core color.  The stamp set is Jack of All Trades (retired) and inked in Pumpkin Pie, Old Olive, Jet Black Staz-On, and Early Espresso.  The sentiment is from Day of Gratitude (also retired).  I used a bit of jute twine and a button from my stash to finish it off.  Thanks for looking!  April

Tuesday, October 15, 2013

Stamp Club Halloween cards

These are two of the cards we made at our stamp club.  The first one uses Moxxie papers, as well as SU.  The image and sentiment come from a SU set and absolutely escapes me what the name could be. 

The second is made with the SU web embossing folder (I think retired), the wide oval and 1" circle punches.  We drew in the legs and used black twine poked through the middle of the web and taped behind the spider and the legs are hand drawn.  Last, are a couple of googlie eyes.  The colors are Whisper White and Basic Black.  Very quick and easy to make.
I will also be posting the other cards we made in tomorrow's post.  Thanks for looking!  April
 

Sunday, October 7, 2012

Class Halloween Treats

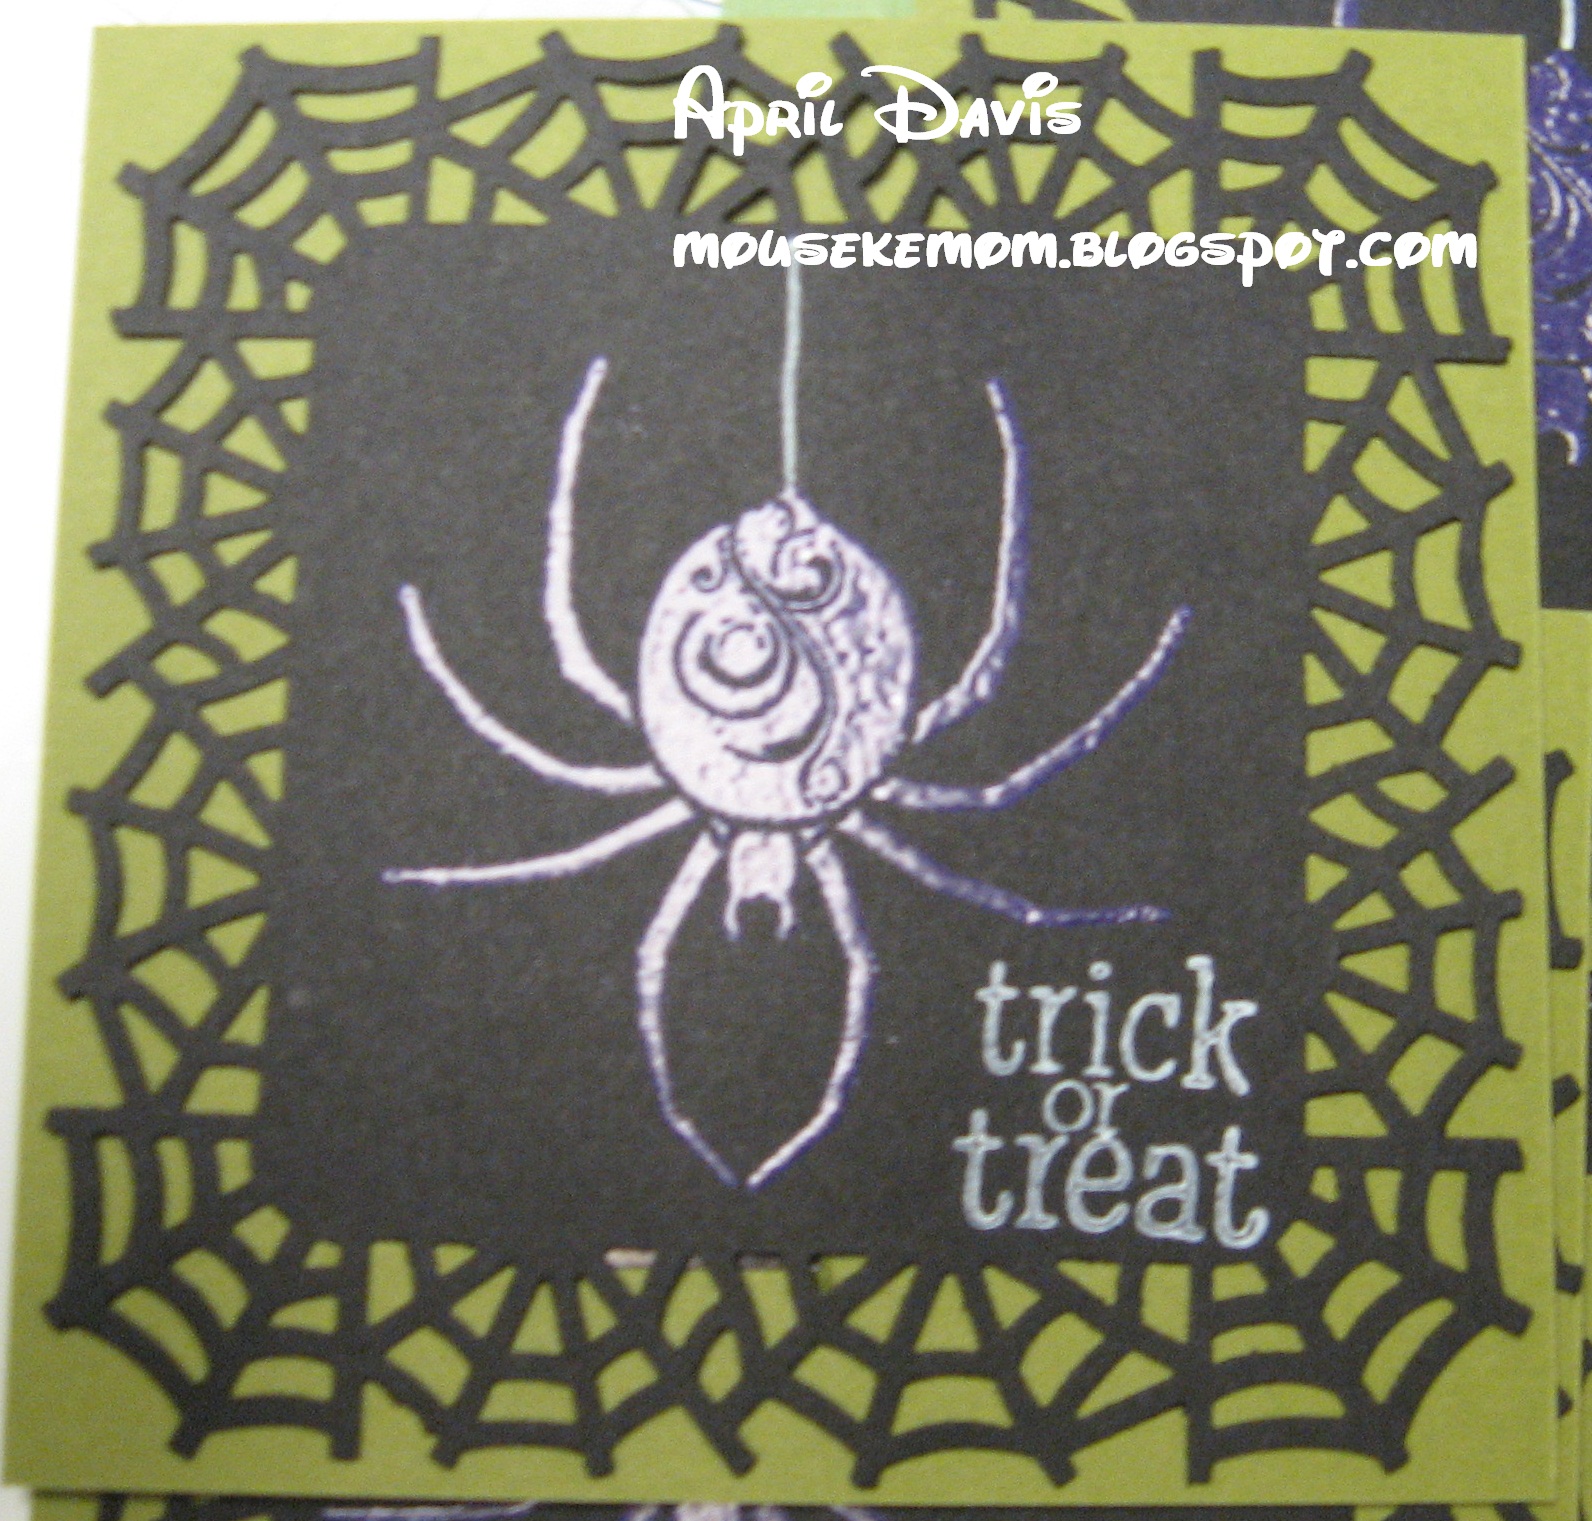
These are the treats I made for my youngest child's kindergarten class Halloween party.  I used SU Old Olive and layered it with a basic black square trimmed with the Martha Stewart web border punch.  I then stamped it with a spider from Michael's dollar bin in Versamark and used purple Adirondak embossing powder and heat set.  Next was a white gel pen to make the thread the spider hangs from and Whisper White craft ink to stamp the sentiment from an acrylic October set from Michael's dollar bin.  On the back side, I used a curved die tool to make the notches to hold a coupon for a free item at McDonalds.  (Every year McD's sells these coupon booklets to raise money for their Ronald McDonald House charity.)  I figured they would be full of yummy treats from their party and trick-or-treating, so this would be a fun little thing for later on.  Thanks for looking!  April
close up
front & back

Saturday, September 8, 2012

Boo 2 You!

This is for Mojo Monday #257 and Pixie Dust Studio's Boo challenges.
The base is Old Olive with layers of retired SU halloween paper, Pumpkin Pie and Basic Black.  The border is Martha Stewart's web and the image is mounted on a scalloped circle from nestabilities.  The image is PDS Pixie Boo and is colored with copics.  The ghosts were colored a second time, but out, frosted with clear glitter for a more translucent look and mounted with dimensionals.  Pixie has a orange satin bow.  The ribbon is a satin checkered ribbon from Michael's.  I hand wrote the sentiment and trimmed the notch, before curling the end.  Thanks for looking!  April

Friday, September 7, 2012

Good Witch or Bad Witch?

This is for Pixie Dust Studio Halloween challenge. 
The base is kraft with layers of basic black and 7 Gypsies Venice papers.  I distressed and ripped the top layer for interest.  The strip is a scrap of matching paper and mounted on a piece of black that is punched with the Martha Stewart web border, then wrapped with some jute twine.  The base layers are sprayed with Silver Foil smooch spritz.  The clock is made with the Tim Holtz weathered clock die and is spritzed with Emerald smooch that has a golden sheen.  The image is PDS Good Witch or Bad Witch with it's matching sentiment, colored with copic, and cut with nestibilities classic circle.  I inked it in Tim Holtz distress inks in burlap, tea dye, and vintage photo.  It is mounted on a scalloped circle, before being mounted with dimensionals.  I also cut a second pair of the shoes and coated them in red glitter.  (Gotta pay homage to Wicked and The Wizard of Oz, of course!)
close up of shoes
So, I finished it, and then found these great vintage die cuts from K & Co...oh yea, the bike!  Yea, I added it then had to go back and take another picture.  I am not sure which I prefer, but it looks good both ways.  Thanks for looking!  April

Wednesday, July 13, 2011

Mummy re-do

I was playing around with some scraps I had and decided to do a card I CASEd from Dannie's Designs a couple of years ago.  Here it is with the updated colors...
The base is Concord Grape with layers of basic black and Pumpkin Pie.  The mummy is made from a base of Very Vanilla and inked with Crumb Cake ink.  The eyes are layers of Pumpkin, Whisper White and Basic Black.  The knot is inked on both sides of the paper, then rubbed along the edge of the table so it is more plyable to form the knot.  I also roughed up the edges of the knot.  I had already tacked the strips down, but I think it would have looked cute to distress the edges of the strips too.  Thanks for looking!  April

Saturday, June 18, 2011

I want my Mummy!

This is for TGF's Farm Fresh Fridays "Sentimental" Challenge and Paper Sundae's easel challenge.  
card on display

 I found this super neat pop-up card on Splitcoast Stampers and wanted to give it a try.  The papers are Little Yellow Bicycle's Booville papers, and Stampin' Up Pumpkin Pie, Basic Grey, and Very Vanilla.  The image is the mummy from TGF's halloween digi set.  He is colored in watercolor pencil and inked in CTMH's Brown Bag.  The tombstones are Jolee's.  The moon is punched from a scrap of VV, then crumpled and inked.  The tag is inked in Charcoal cat's eye chalk.  The sentiment is one I typed using Chiller font.  The eyelet reinforcer are two punched scrap circles I layered and set with a jumbo eyelet.  Some jute twine and a scrap of ribbon finish it off.  Thanks for looking!  April  

flattened for mailing
close-up of tag


Saturday, June 4, 2011

Witch way?

Here is a card I started for last week's FF Friday challenge at TGF, but I got sidetracked and had to put it aside...BUMMER! So I decided to enter it into Anyone for Anya & friends polka dot challenge.
Card base is retired Lovely Lilac from SU and layered in Basic Black and Only Orange. I punched circles from some left over Booville paper and embossed some of the circles with the dots 5x7 cuttlebug folder. You can't really see them under the vellum though, so that didn't work so well. I sewed the vellum along the edges, but left most of the circles free floating under the vellum. The don't wiggle around as much as I hoped, but the do move some. The witch is TGF and colored in watercolor pencils and coated in black micro glitter. The setiment was printed on white cardstock, then I used the new designer label punch from SU and punched it again in the lilac, cutting it in half to frame the sentiment. I added some ribbon for texture and the jewels for some dimension. Thanks for looking! April

Monday, March 21, 2011

hundred-acre halloween

Here is my youngest 2008 Halloween LO. The sketch is based on this weeks Creative Scrappers design.
The papers are Booville and Stampin Up's retired Bold Brights - Lovely Lilac and Green Galore. I love cut outs, but never seem to have the mojo to use them. Here is the scalloped circle, then I followed the sketch for the photos, then punched various sizes of circles from the coordinating printed sheets. The title is cut from cricut Pooh and San Serif. I added some black Stickles to the Halloween, then mounted the "hundred-acre" on dimensional. I made a bow out of some leftover ribbon, then sewed a little charm to it before tying it to the button and using glue dots to adhere. Thanks for looking! April

Monday, March 14, 2011

Backyardigan Halloween

Here is my son as Pablo Penguin from the Backyardigans. The LO is inspired from a 2007 pagemaps. Cardstock is standard and Moxxie. I used rickrack from Hobby Lobby's little 99cent spools and ribbon from Michael's. I frayed the ends of the rick rack, then stapled the two in place. I stamped the leaves and acorn from Stampin' Up's Day of Gratitude set in Timber Brown, Blazing Red, Cactus Green, and Forest Green Staz-On. I cut them out and crumpled them to give them an aged and dried out look. The pumpkins are pieced from SU's Pumpkin Pie with the Wide Oval and circle punches, then inked in retired Only Orange. Pablo is the paper piece from the previous blog entry and the title is cut with Cricut's Don Juan font. Thanks for looking! April
Monday, January 31, 2011

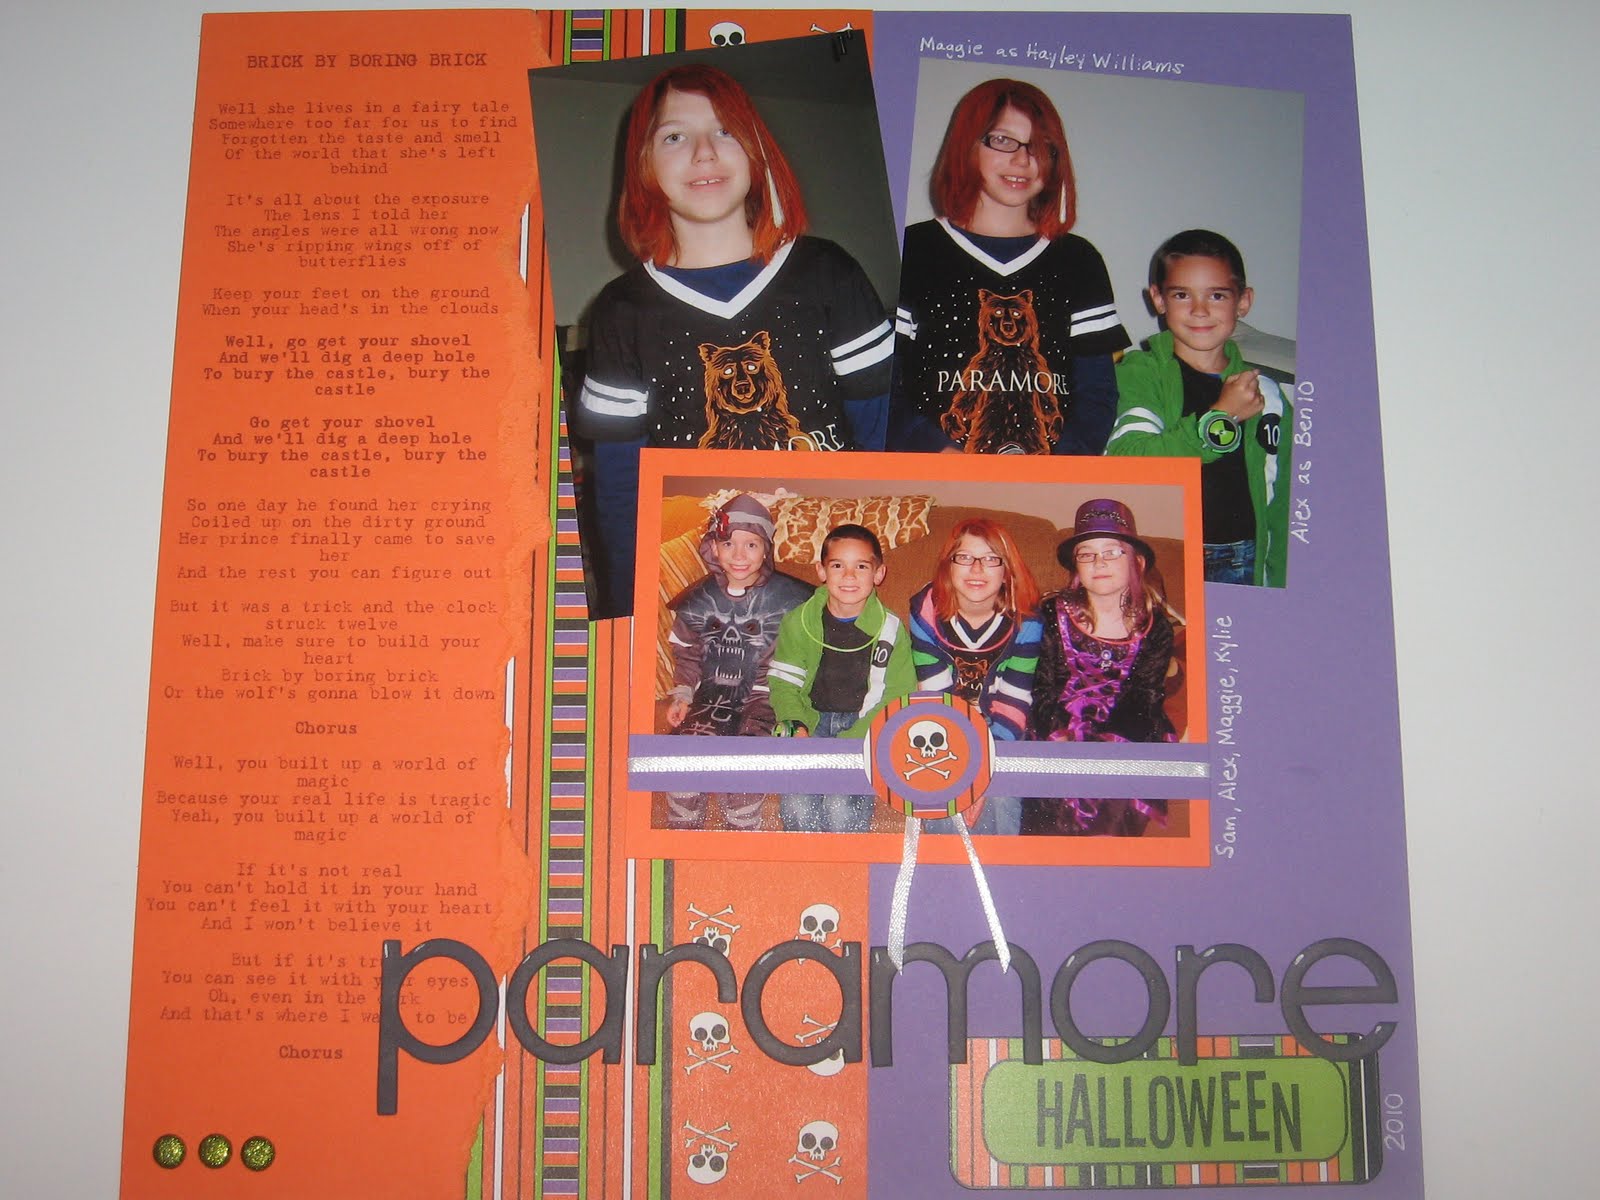
Paramore Halloween

My daughter loves Paramore. I know, she's 10, but loves all kinds of music and Hayley Williams is a surprisingly decent role model, so I can't fault her adoration. She was Hayley for Halloween...too bad most didn't know who she was, even though she was wearing a Paramore shirt.
So the papers are Moxxie and the cardstock is SU retired Bold Brights - Only Orange and Lovely Lilac. I printed the words to Maggie's favorite song Brick by Boring Brick on Only Orange and tore the edge and layered with Moxxie paper. The stripes and skulls are the flip side of the same page. I used a coordinating Moxxie sticker for the Halloween. It said Happy Halloween, but I cut it between the two words and moved it so the "Happy was hidden behind the Halloween, so it looks like a complete sticker, unless you look really close, then you can see the seam. I used basic grey self-adhesive chipboard and ebony cats eye chalk ink to color the letters. I made the medallion on the photo from layered circles 3/4" to 1 1/4".
To finish, I added three SU Brights Glimmer brads to the bottom corner. Can I say while they are pretty, they are a pain in the butt? The glitter is all over the brad and makes it near impossible to separate the tongs! Gah...took me three times as long and lots of bending and prying with tweezers to get them apart. Bah!
Thanks for looking! April

Tuesday, October 19, 2010

Sleuth-tacular Halloween


Yea, so I am still somewhere around two years behind on the kids scrapbooks, so here is some catch up work.
This is my daughter's page for Halloween 2008. She is Darby from the show "My Friends Tigger & Pooh" on Playhouse Disney. My youngest loved the show and I got his costume cheap, so Maggie, bless her little heart, agreed to match him. Papers are Moxxie. I cut the bats at 4.5 inches, then layered a strip from a coordinating sheet of stripes. I journalled a sheet of white cardstock at 4.5 inches wide and used Waltograph font for the title (from dafont.com). The strip at the base of the journalling is the reverse side of the bat paper and using the drippy goo punch from Martha Stewart. Moxxie made the coordinating stickers and I added a bit of leftover ribbon between the photos. There you have it. Thanks for looking! April

Monday, June 21, 2010

Sugar and Spice?


Here is my daughter's Halloween LO. The LO design is inspired by pagemaps. Patterned paper is from Recollections, black cardstock is textured Bazzill, and dark red is from Michael's open stock. Ribbon is from Michael's. I ran the black border through the Cuttlebug with the Swiss Dots folder. I had to work in sections and run each through three times. I also used the Drippy Goo punch on strips of red and inked the edges in Blazing Red Staz-On. I printed the journal and title on vellum cardstock and, because of the design, I had to print them separately and run the vellum through the printer twice. Font are Twilight and Chiller. The cards are from the New Moon trading card set. I also printed a couple of quotes from the Volturi...some from the movie and some from the book. Stamps are from Stamp Insanity's Otherworldly Loves and are stamped in Jet Black and Blazing Red Staz-On. The white border is punched using EK Success's notebook border punch and the little accent on top of it is from a box of Volturi body spray sold by Hot Topic. Thanks for looking! April

Tuesday, June 15, 2010

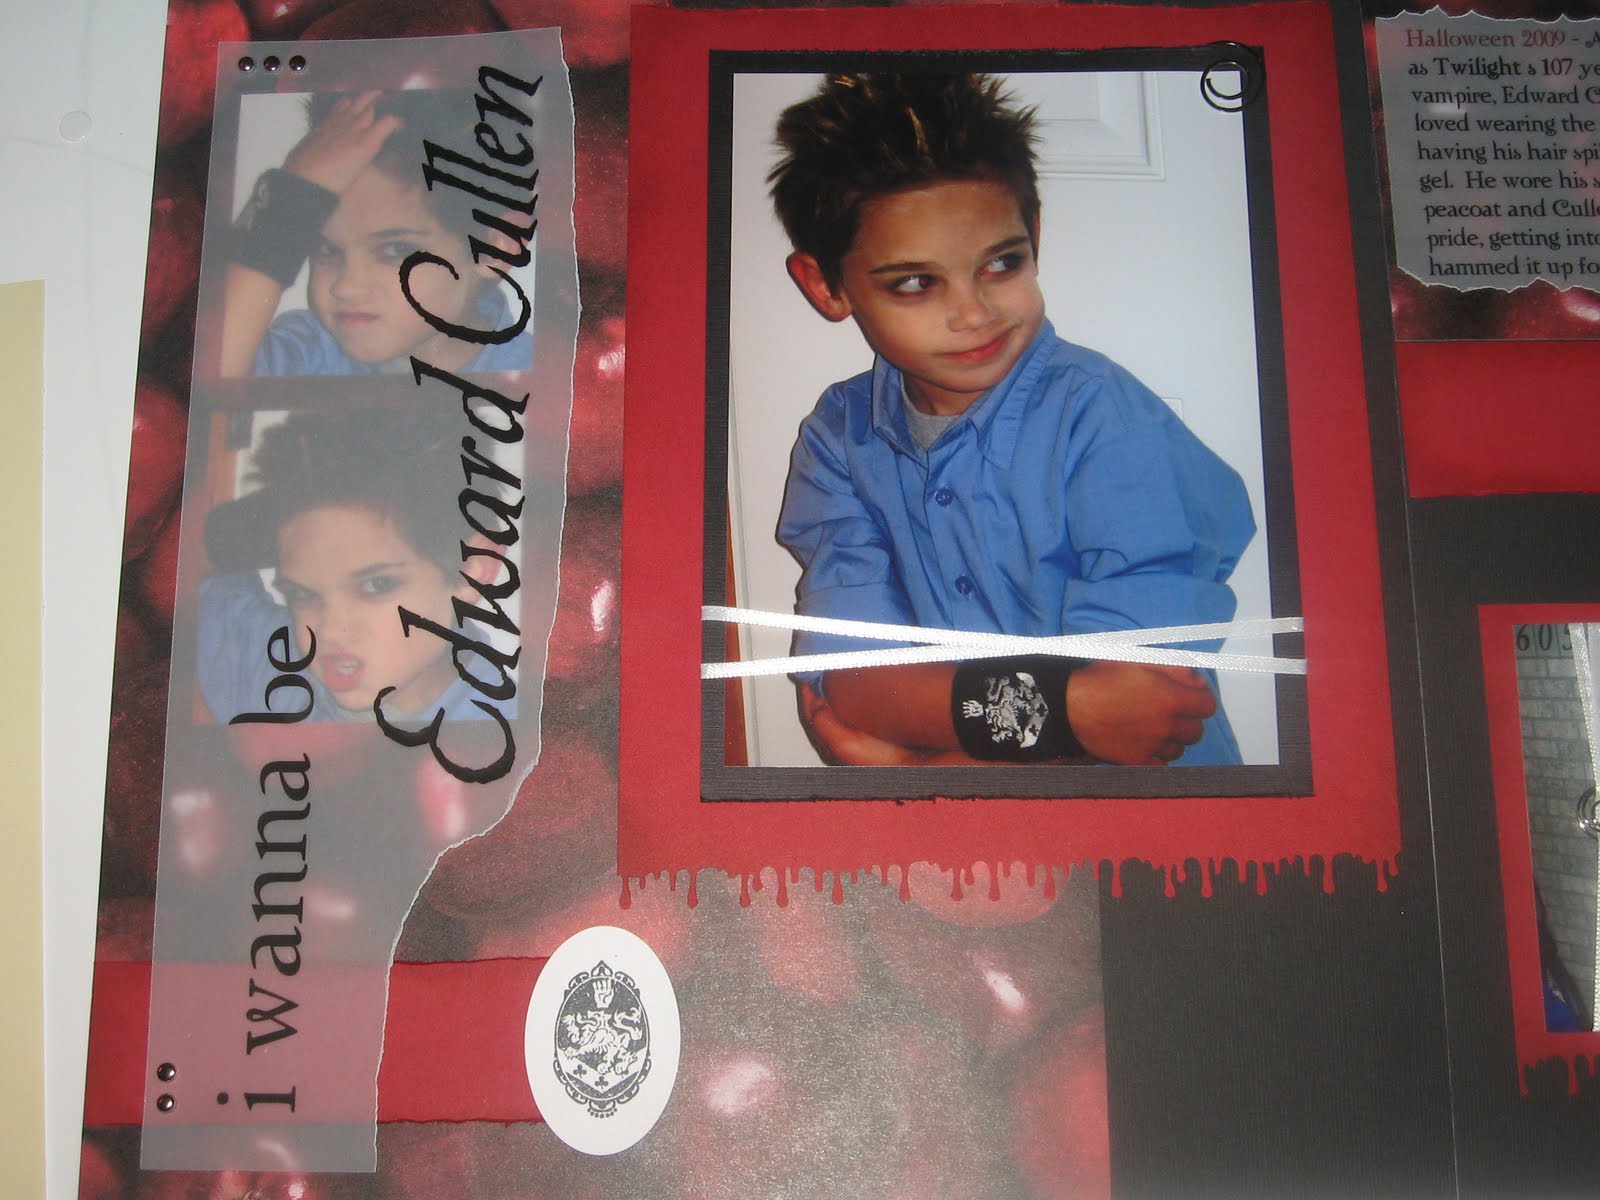
i wanna be Edward Cullen LO


Here is my son hamming it up for the camera Halloween 2009. He did a great job portraying Edward Cullen from Twilight. Isn't he just too cute?
The LO design is from Close to My Heart's Cherish book. Papers are Bazzill black and dark red. The apple B&T paper is from Hobby Lobby. The Team Edward B&T is hand stamped from the Barnes & Noble Twilight Stamp set in Dove Grey Staz-On. The red Bazzill is inked with Blazing Red Staz-On. I also used the Martha Stewart Drippy Goo punch on the photo mats. I roughed up the edges on some of the pieces. The title is printed in be safe (Edward's signature) and twilight fonts on vellum. The Cullen crest accent is also from the Twilight stamp set from Barnes & Noble. The Edward embellishment is Flirty Edward from the Greeting Farm. They have it in Digi or as part of a rubber set. No worries, they have all the Cullens in some form! Yes, I made him so he sparkles! It's hard to see but I assure you, he does sparkle. I also added some ribbon, brads and spiral clips.
Thanks for looking! April