Showing posts with label LEGO. Show all posts

Thursday, October 17, 2013

Stamp Club cards, part two

I am back with the other cards we made at stamp club.  The first is a vintage card with the new SU stamp/emboss set.  We stamped the Whisper White with either Crumb Cake, then embossed, before adding pearls on the flowers.  We used strips of burlap and the SU vintage lace and button's with jute twine to finish the card.


Next, we used the new SU mosaic set in the current In Colors.  We also embossed the strip with an argyle folder and added gems to each of the tiles. 


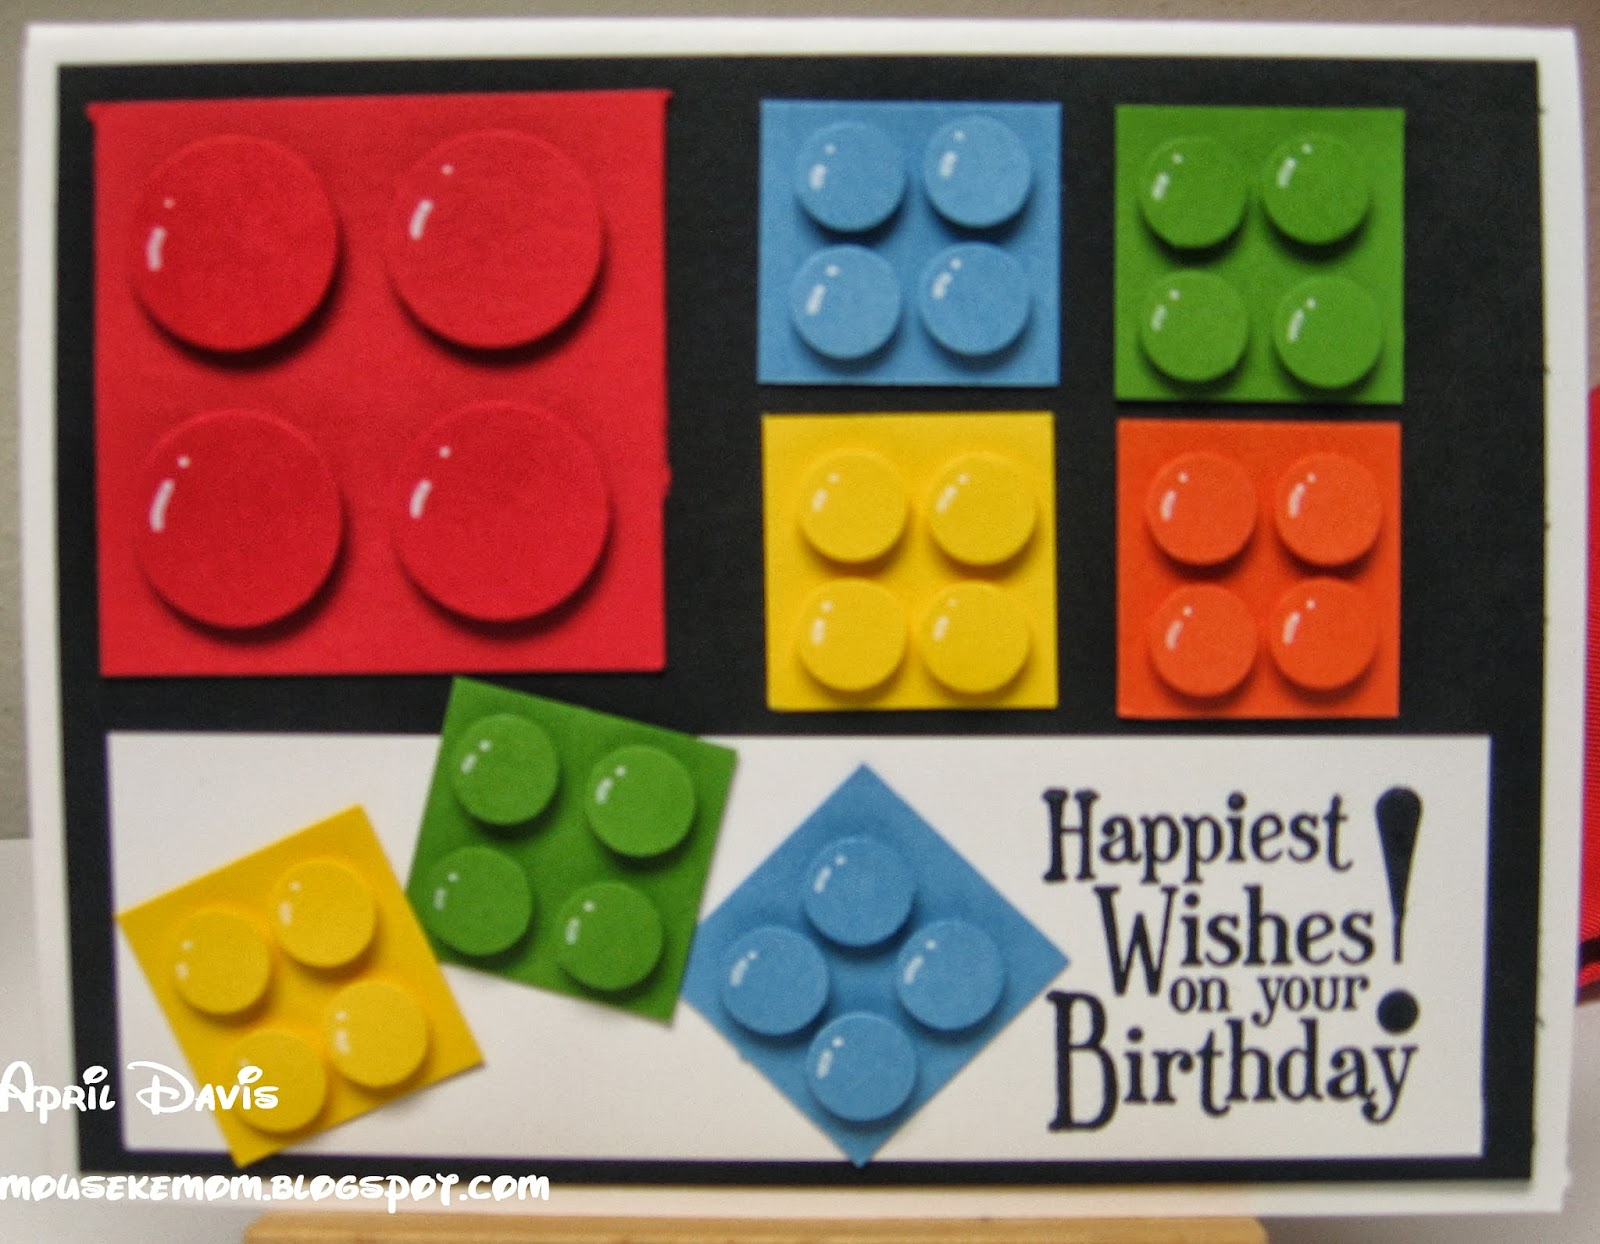
Last, is my absolute favorite (since we have lots of Lego-crazy boys around our family).  It is simply different sized squares, lots of punched circle,s and dimensions.  Here's a quick tip: cut the excess of your dimensionals into pieces to fit the tiny parts.  You get more bang for your buck!  I used a white gel pen to add a little more dimension to the bricks. 
Thanks for looking!  April

Sunday, February 13, 2011

Lego Birthday cake

Here's my son's cake for his party today. The frosting was a pain the in bum, but it came out okay in the end. I used two boxes of cake mix to fill the 9x13, using the left overs for the circles. My daughter has the Easy-Bake oven, so I stole her round pans and baked them in the toaster oven for 12 minutes.
We used his Harry Potter legos and I made the banner using Harry P font from dafont.com and printed on Very Vanilla cardstock. I ripped the edges of the banner and used Chestnut Roan cat's eye chalk to make it look more like parchment. Next I pulled the paper between my fingers to make it curl like you do with ribbon, then attached it to toothpicks with Zots glue dots. Thanks for looking! April

Wednesday, February 2, 2011

Lego favor bags

One of my son's friends can't be at the party and was really bummed, so I thought I would put his goody in a special bag. Turned out so cute, Alex asked me to make them for all his friends. So here I sit with a square punch and little circle punch...you guessed it, hand-glueing little dots onto squares to make bricks. Geez, the things we do for our munchkins.
I had a few left over mini paper lunch bags and used scraps for the pieces. I used the 1 3/8 inch square from Stampin Up/EK Success and the EK Bubble border punch to get the right size circle. I mounted one lego brick at an angle, then put the second "brick" on dimensionals and tiltled it the opposite direction. I then layered two squares to make their tags and stapled to the bag with a bit of leftover ribbon from my stash. They will make cute placeholders on the table and will be our activity. Each boy has a mini lego kit to take home. Thanks for looking! April

Sunday, January 30, 2011

Lego Birthday invitations

So my son is having a Lego-themed birthday party. I decided to look for ideas for party ideas online and found a suggestion for invites. They were more basic - simply standard cards that had the lego words printed across the front a few times to sort of look like the brick. Of course, I have to take it a step further...nothing like feeling competitive and one-upping it, right?
So, I chose a primary cardstock and sat down at the computer. First I printed the "Lego" using three columns and Bauhaus93 font (it was the closest I could get to it's icon). I think it was 36pt and returned twice between, to leave enough room for a circle punch. I fit 15 on a sheet and utilized the shadow and outline options in the format. Next, I set up the info four to a sheet and using two columns.

Once it was all printed, I cut them apart, postcard style...they are the size of an A2 card front (4.25x5.5). Set aside. I used a 1 1/4 inch circle punch to make the LEGO circles. I then used Stampin Up's Summer Sun and Only Orange to ink the pieces (both retired colors). Next come the dimensional on the back of each circle and mount three down and two across. How cute is that? My son is doing a happy dance about his lego block invites.
Thanks for looking! April