Sunday, November 19, 2017

Christmas card 2017

This year's card got way more involved than I had planned but it turned out really cute, so I shouldn't complain.  I saw a really cute window card on Pinterest that was way more detailed and involved than this but it inspired me to pull out the Disney Mistletoe die I had and put it to use.
The base is kraft stock that came with the base and envelopes and is larger than the A2 size.  These are closer to 5x7.  I left it plain because I was worried about it looking too busy.  (I had embossed the test card and it really didn't let the rest of the image stand out.)  The die is cut on Basic Black, then set aside while I cut the Cherry Cobbler frames with a Nestabilities die.  (A SU/Sizzix Top Note Die would have also been awesome too, but I wanted a slightly longer and skinnier die).  The vellum is stamped in Whisper White craft ink using the stars from SU's Holly Jolly Greetings.  It took forever for these to set and they were still a bit tacky when I was assembling the cards the next day.  I put the frame and vellum together then laid it over the die cut.  I had to do a bit of trimming the remove the zig zag edges of the die cut that peeked through the vellum. 
The sentiment is stamped in Gumball Green on a 1 3/8" circle punch.  I would usually pop it up on foam, but wanted to keep these very flat for mailing. Inside the sentiment is from a retired SU Paper Pumpkin kit from a couple years back, also in Gumball Green.  50 cards in just over 6 hours, minus drying craft ink overnight. 
I gotta admit, it took me over two hours to cut the frames and die cuts alone.  Oh, how the Cricut machine would have cut that time down!  I will probably keep it much simpler next year.
Thanks for looking and Happy Holidays!  April

Sunday, November 12, 2017

Birthday Text card

This card is for my BFF.  While we live in different states, we text all the time, often bemoaning the horrors of autocorrect.  I got the new SU set Text Ya Later and knew it was perfect for her birthday.
The base is Soft Safron with emojis stamped in Smoky Slate and layers of retired SU DSP.  The image is stamped in Momento Tuxedo Black, Baja Breeze, and Pear Pizzaz. The inside sentiment is "Well, this is awkward" and Happy Birthday.  I popped the conversation up on foam but used the side pieces, not the hexagons.  Thanks for looking!  April

Sunday, October 29, 2017

Mickey Pumpkin

So we totally got screwed out of going to Disney thanks to Hurricane Irma.  I wanted something to perk up the mood because hubs and I were really bummed.  I had a fake pumpkin stashed in the Halloween box and have been wanting to try carving the foam and see if it is easier than a real pumpkin.  What to put on it?  Mickey, of course! 
I found these small "ears" at Walmart for under $1 each and I had the pattern in one of the old kids books.  I realize I should have blown it up a bit more, but it worked okay.  I used a push pin to mark the pattern then an craft knife to cut.  I finished up by using some small craft files.  The foam was really messy and stuck to everything but it was easier, and less gooey, than the real deal.  The ears are attached with wood skewers.  I also cut a hole in the bottom, just big enough for a battery operated tea-light to fit.  Too cute to spook! 
Thanks for looking!  April

Sunday, September 10, 2017

Pixar Up mailbox tote


My hubby and I are going to Mickey's Not So Scary Halloween Party at Walt Disney World.  We are dressing as grown up Carl and Ellie from Pixar's Up.  I wanted to have a cute tote and found this little chipboard mailbox at Hobby Lobby.  My talented teen painted the mailbox by hand.  I punched holes in the top and added a braided cord handle.  There are also hand-made Ellie Badges, tucked inside, to hand out during the party.  Thanks for looking!  April

Thursday, August 31, 2017

Birthday Cake card

This is a card made from Wild Wasabi card base with Eat Cake DSP and stamped with retired SU Big Day on So Saffron banner in Momento Tuxedo Black.  I also added a little bit of clear stardust gel pen to the banner.  I kept it flat for mailing.  Thanks for looking!  April

Thursday, August 3, 2017

Our Adventure Book autograph album

Hubby and I are celebrating our 20th wedding anniversary at Disney.  I am excited to be attending Mickey's Not So Scary Halloween Party and we will be dressing as Pixar Up's Carl and Ellie.  Of course, our autograph book needed to match our costumes, so I made an Adventure Book from some leftover chipboard from a couple of Paper Pumpkin Kits and a Tim Holtz ring binder spine I found on clearance at Hobby Lobby.

I used faux leather from Cricut to wrap the covers, then used red duck cloth as my binding.  I reinforced it with a scrap from a USPS priority envelope made of flexible TYVEK.  I used E-600 spray and gel.  I will say, the spray is in a pump and is really thin.  Patience is key.  I also learned it will seep through the faux leather and cloth.  I found the gel, in a very thin layer, set much faster.  Be sure to use a brayer to work out any bubbles.
The title was found online, printed and cut.  Once attached, I used liquid glass to seal the ink, in case it rains.  I used a gold sharpie to make the frame.  The globe was also found online and I used a small piece of Stampin Up washi tape.  The  Ellie badge is made with a flat bottlecap and image was found on Pinterest.  The spine is large eyelets and parachute lacing.

Inside book
I used Cricut vintage Mickey and Minnie paper for the pages.  I also used a punch to punch some of the pages and a sharpie to fill in the image. 
autograph pages
I also found some wonderful free autograph printables from Britt-ish Studios and on Pinterest. 
Last page - Carl & Ellie's chairs
I used a Greeting Farm stamp from Sitting Casual and an image from google for the chairs.

I will add instant pics and ephemera during the trip.  Thanks for looking!  April

Thursday, July 27, 2017

Grad Thank Yous

My daughter is starting her senior year next month and we just finished senior photos.  Where has the time gone?  We are slowly planning her grad party for next June and starting to hoard items for the art theme.  She is planning on a major in Art Animation, so I wanted her thank you cards to reflect her interest.
The base is Whisper White with stamps from retired SU Extreme Elements and a Paper Pumpkin starter kit.  Inks are Real Red, Tempting Turquoise, and Daffodil Delight for the primary and I overlapped them to get the secondary colors.  I added detail with the smaller splatter in Pumpkin Pie, Gumball Green, and Blackberry Bliss.  The sentiment is from retired SU SAB set and stamped in Momento Tuxedo Black.  I kept it a single layer for easier mailing.  I also stamped the envelopes to match.
Thanks for looking!  April

Sunday, June 4, 2017

Graduation 2017

My best friend's oldest just graduated from high school.  Where do the years go?  I wanted to make him a special card but a boy is always hard to please.  The base is Basic Black with layers of Cherry Cobbler and Whisper White.  I pulled out these fun stencil parts and added his school color behind it.  I used jute twine and some mini pop sticks to make a garland to hang the numbers on and finished it with a mini grad cap.  I sponged the Whisper White background with Soft Sky and Baja Breeze, then sponged grass in Lucky Limeade and Old Olive.  The clouds are mini post-it notes.  Thanks for looking!  April

Tuesday, May 30, 2017

Confirmation card

Here is a card I made for my son's best friend.  I used The Greeting Farm stamp and colored it (ages ago) in grey tones.  Base is Basic Black with layers of Whisper White and more Basic Black.  I used some Heidi Swapp spritz in Translucent and Silver Smooch Spritz.  I had some odds and ends to add on and placed the fussy cut image on a spring to give it some movement.  Thanks for looking!  April

Sunday, May 21, 2017

Goodbye Hugs

Last month, we moved from Ohio to Wisconsin.  The hardest part was taking the kids from the people and schools they have grown to love over the last five years.  My youngest has special needs and we are particularly close with his teachers and assistants so I wanted a special goodbye for them.  I kinda feel like I was shorting them, but most of my craft supplies were packed and I was single-parenting for the better part of six weeks, so I was not at my most creative. 
I found these adorable hugging hearts on clearance at Ikea and grabbed some Hershey's Hugs, treat bags, chalkboard tags, and some baker's twine to make these.  I used a chalk marker to write "A Hug from Matt" and tied it all together.  The teachers were in tears and tried so hard to make it a great day for him.  We miss them so much and they have been great with helping his new teachers acclimate him to his new school routine.  Thanks for looking!  April

Sunday, May 14, 2017

Brilliant Birthday

This is an alternative card for Stampin Up's My Paper Pumpkin set from July 2016.  I saw a similar card on Pinterest and decided to recreate it.
The base is Whisper White and I used Momento Tuxedo Black to stamp the jar from CTMH Little Treasures and the sentiment from the Paper Pumpkin set.  The jewels are stamped in Emerald Envy, Real Red, Pacific Point, Daffodil Delight and Blackberry Bliss.  I added a little bling to the sentiment but kept it flat for easy mailing.
Thanks for looking!  April

Sunday, April 30, 2017

Hello from...


Our moving between states has been an adventure and our realtor has been amazing!  She spent an entire weekend showing us houses and then several additional nights showing my husband many more.  I wanted to give her a small thank you so I decided to make these note cards. 
bundled for gifting
The bases are Whisper White and stamped in Stampin Up's Map It Out and Waunderlust in Basic Black, Bermuda Bay, Real Red, Smoky Slate, and Not Quite Navy.  I left the hello tag empty for her to personalize as she wished...state, city, her name or company, etc.  I added a small gem to where we were near in Wisconsin.  I wanted to keep this very flat for easy mailing.  I also stamped the envelopes with the heart trail and plane, before bundling it all up in a bagging and tying it all with baker's twine.  Thanks for looking!  April

Sunday, April 23, 2017

Etched Mickey Shakers


As you know, we are Disney people.  Now my family is fine with Disney items scattered around the house, but we are not ready to dedicate ourselves to Mickey dishes and such.  With the new house, we are replacing some worn items and freshening up our decor.  We are updating our kitchen wares, including the dishes.  I was looking for some cute salt and pepper shakers and found some cute etched glass ones online.  However, I was not prepared to spend over $30 for them and knew there was a better alternative.  So, off to the dollar store...no luck.  I found shakers at Kroger for 89 cents each.  The glass etch paste is a whopping $14.99 for a tiny pill bottle size.  Bless Michael's and Hobby Lobby for 40% off coupons! 
showing sides of shakers
I cut the design from Cricut's Mickey Font on some scrap vinyl.  HINT:  Be sure to wipe all fingerprints off before placing your vinyl.  Press well and, again, wipe away smudges.  Follow the directions on the etch paste.  I used a foam brush and a paper plate, easily disposable.  The stuff is caustic but I did not notice much smell and I have a sensitive nose.  When you start rinsing, you will think it did not work.  I used a paper towel to dry and buff as I removed the vinyl images.  As it drys, the image is much more crisp.  I have enough solution to do another set of shakers or maybe a glass vase.  Thanks for looking!  April

Thursday, April 20, 2017

Chicagoland Vampires SMASH

One of my favorite book series is coming to an end and I wanted to commemorate it in my SMASH book.  So here you go.  Some glittery letters, pics of the covers, and some quotes and ephemera.  Thanks for looking!  April

Sunday, April 9, 2017

Upcycled basket

We are in the process of moving to Wisconsin and I have been working on decorating ideas for my new home.  I have been busy picking paint colors and figuring out what we want to change.  I wanted to add some coordinating storage for my bathrooms but we are on a strict budget and spending $20 on a basket is not an option.
Behold, the crafty upcycled basket!  I wish I could take credit for this but I found it on Pinterest.  Nope, no underwater basket weaving experience needed.  All you need is a small box (mine is a small Amazon 5x7x10ish), thick jute twine (under $4 at Walmart), and some cheap fabric (muslin $1.97/yard at Walmart).
A quick recap of instructions: 1. Cut top flaps off box.  2. Start at bottom of box and hot glue the twine along one side.  HINT:  Leave a little tail.  I curled mine up the corner of the box and hid it under the next layer of twine.  3. Continue moving from bottom to top of box.  HINT:  Hide top tail of twine inside one corner of the box.  The liner will cover it.  4. Measure depth and width of box, adding 1/2" for seam, adding 2" on top for fold over.  5. Sew each side before adding bottom.  HINT: I chose to finish the top seam so it was easier to hide the raw edge.  6. Match corners and pull over box edge.  
I will be honest, if you are not into sewing, you can use fabric glue or webbing, but even a beginner can do this.  Be patient, double check your measurements before cutting, and sew as straight as you can.  I will admit the bottom is the hardest part to attach but it is very forgiving.  I was concerned I would need something to keep the liner in place but it is a very snug fit over the edge of the box.  Directions for liner are in a separate post linked with the box directions.
I made two boxes for about $5.  There is enough leftover twine and fabric for a third small box.  Thanks for looking!  April

Sunday, March 26, 2017

Red SMASH book cover

So I finally finished up my orange SMASH book.  Here is the cover of my new red one I have had stashed away.  This one is a bit different as it came part of a kit and has photo sleeves inside.  I used a left over Cricut cut fan from a past scrap page, a piece of paint sample, a library borrow slip, an old stamp, and some SMASH ephemera.  Thanks for looking!  April

Sunday, March 19, 2017

Christmas Ornament

I made a couple of generic ornaments for the Principal and secretaries at school.  I did different colors for each but only took photos of one.  The colors I used were Old Olive, Cherry Cobbler, Not Quite Navy, and Marina Mist.  The stamp is from Stampin Up Tags Til Christmas and punched with the ornament punch six times.  Fold each ornament in half and glue together.  I used nylon sewing thread to hang them inside the ball.

The packaging was found at Hobby Lobby and I stamped with Holly Jolly in Marina Mist. 
Thanks for looking!
April

Sunday, March 12, 2017

Spotify SMASH page

Spotify sent me this great email with a list of my listening habits, favorite tracks, most listened to artist, etc.  I thought it was a great snapshot of what I listened to over the year and a perfect SMASH page.  I used a SN@P filler card, some SMASH bits and an artist trading card.  The title is Tim Holtz metallic alpha stickers.  Thanks for looking!  April

Sunday, March 5, 2017

Storybook ornaments

I had a couple of challenging requests for the ornaments. 
Pete the cat is well...ugly.  I had no idea what to do for this one and spent a good two hours searching images.  Silly me for not asking my youngest who knows Pete and said "His snow book, mom!"  I found the image from Pete the Cat: Snow Day and printed it multiple times, and with mirror image printing.  I cut Pete shoveling snow and then cut the shovel and his head out of another print, using dimensionals to make a multi-layered image.  I did this to both sides so it didn't matter which way the ornament turned.  I added some glitter to the snow and shovel then used hot glue to get Pete to stand inside the plastic ball.  Last, I added glitter snow and mini pom-poms for snowballs. 
Next was Curious George.  I ended up finding this great image of a craft where he is hanging from balloons.  The balloons were a separate element and easy to leave out.  I shrunk the image, and printed it as I did with Pete.  I only used dimensionals on his head to make it stand out.  I used clear nylon sewing thread to make him hang from the top of the ball so he will look like he is hanging off a tree branch.  Then I added glitter snow and pom pom snow balls to the bottom, before sealing the ball with liquid glass and adding the hanging ribbon. 
Last, is Harry the Dirty Dog.  I could not find any really good images of Harry, so I used the book cover and printed it like the other ornaments.  I cut the dogs separately and added them with dimensionals, then glued the book into the ball and sealed it.  I also made a Amelia Bedelia book the same way.
I somehow missed pictures of the Giving Tree (I made an actual book with tiny pages).
Thanks for looking!
April

Sunday, February 26, 2017

Hogwarts Letter SMASH page

While I was working on the Harry Potter ornaments, I printed mini Hogwarts acceptance letters to go in my envelopes.  Sadly, they were just a bit too big but I am too much of a pack-rat to toss them out.  I had a wrapper from a Chocolate Frog and some other bits so I put together another SMASH page for Harry.  If you want to see the other one, click here.  Thanks for looking!  April

Sunday, February 19, 2017

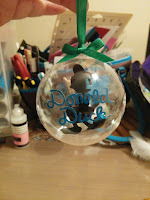
Disney ornaments

More teacher gifts included Disney characters.  These are inexpensive plastic balls from Michael's.  I used a window sheet and vinyl cut from Cricut cartridges.  Once the images were placed on the window sheets, the sheet is wedged between the two halves of the plastic ball and sealed with a bit of liquid glass, before adding a hanging ribbon.

First up is Donald Duck and Mickey Mouse.  I used the Mickey and Friends cartridge for the silhouette and autograph.  The Mad Hatter is from the Disney Classics cartridge.  He did not have an autograph so I used Doodletype for the "Simply Mad". 
They were a big hit and the teachers asked a lot of questions on how I did it.  
Thanks for looking! 
April

Sunday, February 12, 2017

Gratitude SMASH page

Hallmark sends these greeting cards with coupons and I keep them to reuse.  This thanksgiving themed one became my list of gratitude for this year.  I placed it on the Top 10 page of my Orange SMASH book.  I used a SMASH label maker to make my list and scattered them around the greeting.  Super simple and fun.  Thanks for looking!  April

Sunday, February 5, 2017

Harry Potter ornaments

I warned you I was behind on my blog posts.  As a teacher, I know there are only so many apple-themed items a person can own and generic stuff is cute, but quickly ends up in the goodwill pile.  I always try to choose gifts for the teachers and para-educators that have special meaning and something they want to keep.  Last year, was sharpie mugs featuring each person's favorite Disney character.  This year, I asked for their favorite children's book or character.  I got several who said Harry Potter.  I did not want everyone to get the same ornament, so I made several different HP themed ones.  Here they are!
The Remembrall was filled with burgundy wired organza ribbon.  I looks wispy but the wire allowed me to bend the ribbon different directions.  Once I sealed the plastic ball with a bit of liquid glass, I cut a strip of gold metallic washi tape in half, then placed it over the seam of the plastic ball.  I printed Neville Longbottom's quote on a tag and tied it to the ball, along with a hanger.
The cauldron was so easy.  I found a pack of party treat cauldrons on clearance after Halloween and stuffed a bit of poly-fill into it to look like foamy steam.  I printed the label from the Hogwarts school supply (standard cauldron, black, size 2) on a tag, then added it to the cauldron.
The golden snitch is a pack of dollar store gold ball ornaments, feathers, and gold glitter hot glue.
Not pictured: a ball with a wood owl holding a tiny owl post letter, a printed Hogwarts envelope, addressed to Harry and sealed with a Hogwarts wax seal and a small pillow box printed with Owl Post, twine and wax seal.  (Tip: I found the wax stamp on Amazon, along with cranberry hot glue sticks.  Spray some cooking spray on a paper towel, press stamp into the cooking spray, squirt hot glue on a silicone mat, let cool for a few seconds, then press stamp into glue, hold until glue sets, then slowly rock the stamp to loosen.  I made two dozen in just a few minutes.)
Thanks for looking!
April

Sunday, January 29, 2017

Stamp Club SMASH page

I am truly missing the art of SMASH...I like some kind of order and find it hard to go over the edges are be super chaotic.  I really like my items on a page to be related or compliment.  This took some real effort for me to keep putting more on the page on this but I like how it looks.  I used my instax mini instant photo to take pics of the Laughing Ladies stamp group.  Sadly, our schedules have prevented us from getting together for several months now, but I enjoyed them.  Sue, our group organizer is a Stampin Up rep, so I included a My Paper Pumpkin graphic, and the Mickey ice cream bar was on one of my monthly swaps.  Thanks for looking!  April

Sunday, January 22, 2017

Harry Potter Birthday


gift bag with copic colored characters

Butterbeer with straw and wood owl
With teens, our go to birthday gift is a movie rental kit.  We put in a gift card to our local rental place, popcorn, and their favorite candies.  My son was invited to a Harry Potter themed party and insisted we put together a HP themed movie kit.  There are several pics but not everything in the kit is photographed.  We included a homemade "Liquid Luck" potion, packed in a gemstone shaped box, a decorated bottle of Butterbeer, a paper haystack filled with candy, Hershey's kisses decorated as Dementor Kiss-Aways, boxed candy wrapped in Honeydukes wrappers, an origami Howler (complete with Mrs. Weasley's rant), and several other surprises.  The kids went nuts when it came time to open it and it was the hit of the party.  Every kid told Alex they would definitely look forward to their birthday gifts!
gift card envelope, sealed with wax

origami Howler

Thanks for looking!
April

Sunday, January 15, 2017

Read 2016 SMASH page

So I have kept a list of books I have read over the last several years and start a new SMASH page each year.  Somehow I missed posting 2015 and will do so later. 
This year is much more list like but I needed to stretch to three pages.  I often will remove pages from my SMASH books when they are getting too bulky.  I just tear them out, then cut off the binder edge.  Sometimes I will use them as background or texture for other layouts and for extending a layout.  To do this, I simply use washi tape and a page that best coordinates.  By cutting off the binding edge, the added page fits right in.  I have done this for my Robert Frost page.  This year, I used washi tape and some cute Heidi Swapp stickers.  Yes, it went onto the back side of the third page...a total of 143 books.  Thanks for looking!  April

Sunday, January 8, 2017

Tinkerbell Believe shirt

My last Tinkerbell shirt has been repinned over two thousand times on Pinterest.  I made that one for my bestie and decided I wanted a similar shirt to wear at Disney with her.  I decided to use the Tinkerbell and Friends Cricut cartridge and used the Cricut Craft Room to blend the "believe" image with a Tink image.  The weeding of the wings and dust took a bit of time and patience but look how cute it turned out! 
Thanks for looking!
April

Tuesday, January 3, 2017

Glee SMASH page

I have been neglecting my SMASH book and have several pages I have not had the chance to post, so here they are. 
This is for the show Glee, my guilty pleasure.  I am shocked how many songs from the show I like better than the original versions.  I know the show is no longer on, but I had the idea rolling around and wanted to get it down.  I traced my hand and cut the letters from the Cricut.  I added some journaling and doodled music notes.  I also found a patch at Big Lots for 75 cents.  Thanks for looking!  April